What do you do when your 21 month old goes from taking perfect naps without ANY fuss to refusing to nap and being an absolute grouch by bedtime?
I put her down for a nap anyhow. But she falls asleep very late if at all. . .
I am so sick of this.
Any wisdom out there?

Thursday, February 9, 2012
Wednesday, February 8, 2012
Valentines

My kids always love crafts and making Valentines is a fun one to include them both in even when A is only 21 months :) She loves drawing with pastels. D loved drawing and putting the ladybugs on.
What do you do with your kids for Valentine's Day?
Sunday, February 5, 2012
Nap War. . . or. . . Wow, God!
Lately my 21 month old girlie has been giving me a taste of the terrible twos. The one who always went down for a nap without a fuss and fell asleep like a dream has now taken to standing up and being noisy and just plain NOT sleeping.
My 3 1/2 year old goes down for a nap/quiet time. He didn't sleep a single day this week. But I didn't expect him to.
I have been really worn out lately. It is usually when they nap that I can relax and paint or take a nap myself. These last two days I have wanted to nap- but no luck. How can I sleep when they aren't?
Yesterday I got so frustrated with them. I wonder if it is worth this struggle. I finally put D in a different room and A finally fell sleep at 16:00 rather than the usual 13:30 or two.
Today was looking to be a repeat of yesterday. It is in times likes these I am very aware how much I need God's wisdom and guidance and PATIENCE as a Mom. I separated them much earlier this time and had D go downstairs to sleep/rest. He NEVER sleeps down there, but at least then A can fall asleep. She cried and carried on. I went and gave her a hug and told her I would be right here and that it was nap time. (Aren't I always here?) Finally, she fell asleep! Whew!
I had set the timer for D because he wanted to play with toys in bed and I had said he needed to try and sleep for 30 minutes and then I would let him play quietly in bed. When the timer went off I went to check on him and I was astounded to see he had fallen asleep! Wow, God! Thank you!
So my stressful afternoon has now calmed. The Giver of all patience and wisdom has overcome.
What do you do about nap times?
Saturday, February 4, 2012
Quotes on Pregnancy
Altogether pregnancy and birth is a richly intuitive and instinctive process, a woman will prepare her "nest" and birth according to the style of her culture, in the same way that a particular species of bird will build its nest with whatever is available.
As I continue to read through "Birthing From Within" by Pam England many things jump out at me. I wanted to include some of my favorite quotes.
If you envision giving birth in only one way and one place, your chance of being thrown off balance by the unexpected increases dramatically. The more ways you envision yourself giving birth, the more power you bring to your own birth.
When you think about it women give birth every day in unbelievable places and circumstances. Even as you read this, babies are being born . . .
in hot tubs, and warm ocean pools. . .
in rice paddies, mountain villages, and igloos. . .
in beds, birth huts, and birthing chairs.
Mothers the world over give birth
counting stars and under bright lights. . .
in fields, dugouts, and by fireplaces. . .
in planes and trains. . .
in one room shacks and operating rooms.
Mothers and nature always find a way.

Pg. 82 (Birthing From Within)
Friday, February 3, 2012
DIY: Felt Balls Tutorial
Everyone knows kids love balls. And what kid would not love making their own ball, especially if it involves soap and bubbles?! Here is a little tutorial on how to make felted balls. This is for ages 1 and up. My 20 month old loved this as well!
You will need:

2. We wanted to make our balls in a variety of weights because this makes playing with and learning more interesting for kids.
Take a piece of wool and if you are wanting to include something inside then wrap it around whatever you are using. You can then wrap around it with yarn to make a nice ball shape. If you are using only wool then do the same and make a nice ball form.
With small balls this is not necessary and you can simply form and poke them with the needle so as to get a nice ball shape.
For the larger balls when you have the desired shape then you must wrap it with another layer of wool and "attach" it to the inner ball by poking it here, there and everywhere. Be careful- these needles are sharp. If you have something inside poke gently so as not to break your needle.


3. When you have all your balls shaped to your satisfaction you can begin the process of wet felting. If you would rather not you can also complete the balls in the dry felting method by continuing to poke them until them are hard and hold together well. But since kids like wet felting this tutorial is on that method.
Put each medium or large ball in a knee high stocking and tie loosely. Smaller balls can be done in your hands without the knee high. Place the balls in a large bowl. Grate soap generously and pour warm water over them. We used about an inch- you can add more more or less depending on your desires.
Then begins the process of gently forming the ball. While it is still very soft you must handle it gently, rub it, drop it, press it GENTLY! It is getting wet and the fibers are starting to mold together. This gentle part is important so that it sticks together and has a nice form.

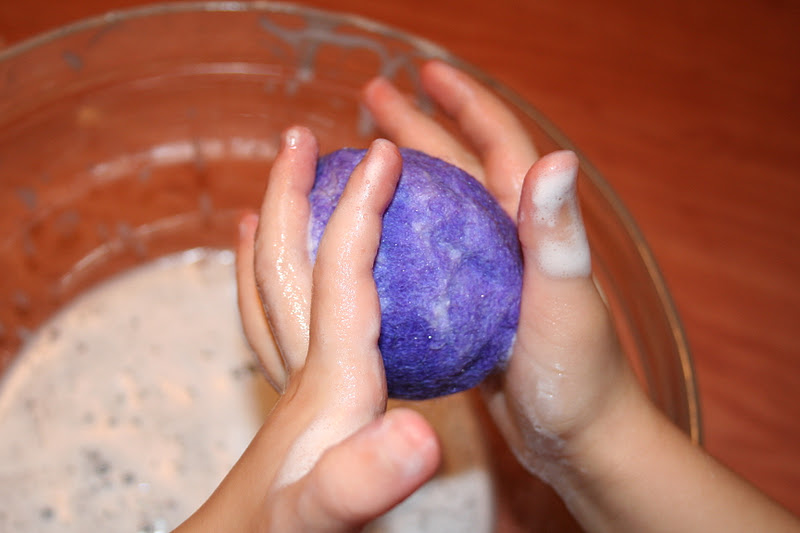
When you see the stocking is starting to stick to the ball take the ball out and continue without it. It should be well enough along that it will hold together nicely.


Continue rolling it, and gently adding pressure as you see it forming better and sticking together better. Add more grated soap and water as necessary.
4. When you feel they are sticking together nicely and will not fall apart when thrown into the washing machine then you are ready for the next step. The process of rolling and felting can take a long time 15-20 minutes, also depending on the size and amount you are making. Have patience and enjoy this process. My kids didn't tire if it :)

5. Put all the balls in the washing machine. ( I have a front load) And put on a short cycle of no more than 15 minutes. I didn't add any soap because they were already very soapy. This process was just rinse and spin. But the friction and heat causes the balls to form even better and they come out nice and round and hard.

6. Let them dry and enjoy!
7. You can also decorate them by needle felting designs on them, adding buttons or beads or attaching a piece of elastic so as to make a bouncy ball, etc. The opportunities are endless!
Here are some links to videos on You Tube. Each person has a different method. So learn and enjoy.
You will need:
- Wool
- Felting needles
- Sponge
- Rattle, rock, etc. (For making a variety of balls- some more heavy than others).
- Yarn
- Knee high or panty hose (that are no longer needed)
- Large bowl
- Soap Bar
- Grater
- Warm Water
You can find wool and needles on ebay if you can't find them locally. You may also need a sponge depending on the size of balls you wish to make. If you choose to make small balls then you need to do the poking on a sponge so as not to poke yourself.

2. We wanted to make our balls in a variety of weights because this makes playing with and learning more interesting for kids.
Take a piece of wool and if you are wanting to include something inside then wrap it around whatever you are using. You can then wrap around it with yarn to make a nice ball shape. If you are using only wool then do the same and make a nice ball form.
With small balls this is not necessary and you can simply form and poke them with the needle so as to get a nice ball shape.
For the larger balls when you have the desired shape then you must wrap it with another layer of wool and "attach" it to the inner ball by poking it here, there and everywhere. Be careful- these needles are sharp. If you have something inside poke gently so as not to break your needle.


3. When you have all your balls shaped to your satisfaction you can begin the process of wet felting. If you would rather not you can also complete the balls in the dry felting method by continuing to poke them until them are hard and hold together well. But since kids like wet felting this tutorial is on that method.
Put each medium or large ball in a knee high stocking and tie loosely. Smaller balls can be done in your hands without the knee high. Place the balls in a large bowl. Grate soap generously and pour warm water over them. We used about an inch- you can add more more or less depending on your desires.
Then begins the process of gently forming the ball. While it is still very soft you must handle it gently, rub it, drop it, press it GENTLY! It is getting wet and the fibers are starting to mold together. This gentle part is important so that it sticks together and has a nice form.

When you see the stocking is starting to stick to the ball take the ball out and continue without it. It should be well enough along that it will hold together nicely.

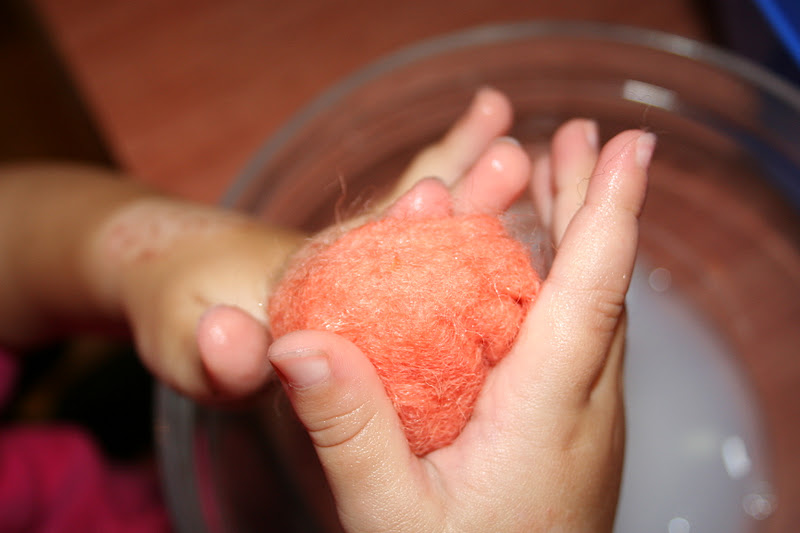 |
| Cute little baby hands :) |
Continue rolling it, and gently adding pressure as you see it forming better and sticking together better. Add more grated soap and water as necessary.
4. When you feel they are sticking together nicely and will not fall apart when thrown into the washing machine then you are ready for the next step. The process of rolling and felting can take a long time 15-20 minutes, also depending on the size and amount you are making. Have patience and enjoy this process. My kids didn't tire if it :)

5. Put all the balls in the washing machine. ( I have a front load) And put on a short cycle of no more than 15 minutes. I didn't add any soap because they were already very soapy. This process was just rinse and spin. But the friction and heat causes the balls to form even better and they come out nice and round and hard.

6. Let them dry and enjoy!
7. You can also decorate them by needle felting designs on them, adding buttons or beads or attaching a piece of elastic so as to make a bouncy ball, etc. The opportunities are endless!
Here are some links to videos on You Tube. Each person has a different method. So learn and enjoy.
Thursday, February 2, 2012

Wednesday, February 1, 2012
Homemade Mouth Wash
Due to the fact that using Listerine during pregnancy is a no-no (my hygienist told me this) I have decided to try some natural options. Here are a few recipes I plan on trying. I will let you know later which I like best. I like using Listerine because I have sensitive gums and need something to take its place.
I found some great sites and each of the titles should take you to their sites.
This recipe makes about fourteen ounces and can be stored for two weeks in a dark, cool cupboard. Use it in the morning and the evening.
Mix the following together and pour into a repurposed bottle of some sort.
1 cup aloe vera juice (fairly inexpensive at Trader Joe’s among other places)
1/2 cup distilled water (I just used filtered)
1 tbsp. witch hazel
2 tsp. baking soda
20 drops peppermint essential oil
The taste of this mouthwash definitely differs from the store-bought conventional type, but I got used to it after a few times. It leaves your mouth feeling fresh and minty, using nothing artificial to get you that feeling!
This next article was too long to include here, so you can just click on the title.
Homemade Mouthwash
Have you ever made your own mouth wash? What recipe did you use?
I found some great sites and each of the titles should take you to their sites.
Recipe 3: Herbal antibacterial mouthwash
- Place 1 ounce cloves or powdered myrrh, or 2 to 4 ounces of goldenseal or rosemary in a pint-sized jar.
- Pour boiling water on top of the herbs.
- Let steep overnight, then strain.[2]
Homemade Mint Mouthwash
Mouthwash is great for our mouths. This homemade version is antibacterial so it will not only help keep your teeth and gums healthy and free of unwanted debris, but it also will help with breath freshness. Making this recipe from scratch will even save you money as many of these ingredients you probably already have on hand at home.This recipe makes about fourteen ounces and can be stored for two weeks in a dark, cool cupboard. Use it in the morning and the evening.
Mix the following together and pour into a repurposed bottle of some sort.
1 cup aloe vera juice (fairly inexpensive at Trader Joe’s among other places)
1/2 cup distilled water (I just used filtered)
1 tbsp. witch hazel
2 tsp. baking soda
20 drops peppermint essential oil
The taste of this mouthwash definitely differs from the store-bought conventional type, but I got used to it after a few times. It leaves your mouth feeling fresh and minty, using nothing artificial to get you that feeling!
This next article was too long to include here, so you can just click on the title.
Homemade Mouthwash
Have you ever made your own mouth wash? What recipe did you use?
Subscribe to:
Posts (Atom)